Pay as you wish via PayPal or credit card. Pay as you wish via PayPal or credit card.
ORIGIN-INDY Cruze Tower Installation Guide
Before the installation, please read the following tips carefully.
1. You will receive 2 separate packages for this tower, one is big for the top sections and legs which is also a standard wakeboard tower including a full set of mounting kit for standard wakeboard tower installation. The other carton is smaller which includes the pair of base bars and a set of mounting kit for pontoon boat.
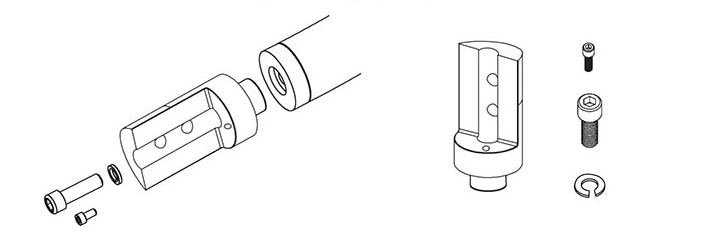
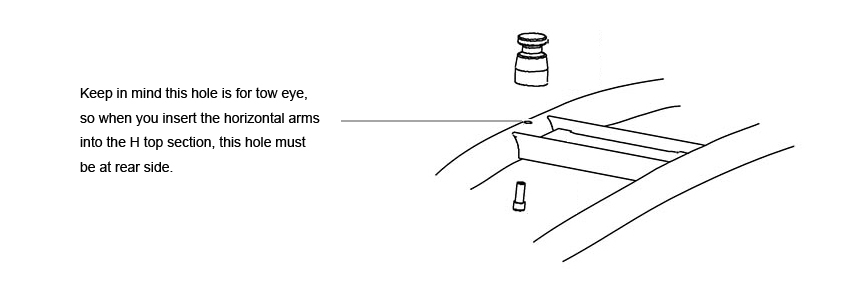
2. The tow point is removable. If you use the tower a radar arch, you can discard the tow eye or install it upside down in case it blocks your radar installation.
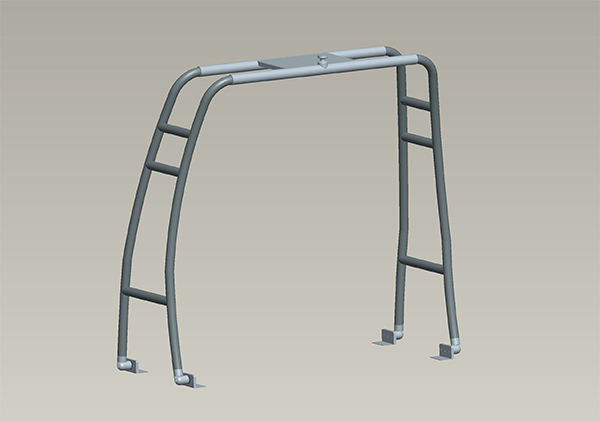
The big carton will include the following parts for a standard wakeboard tower.
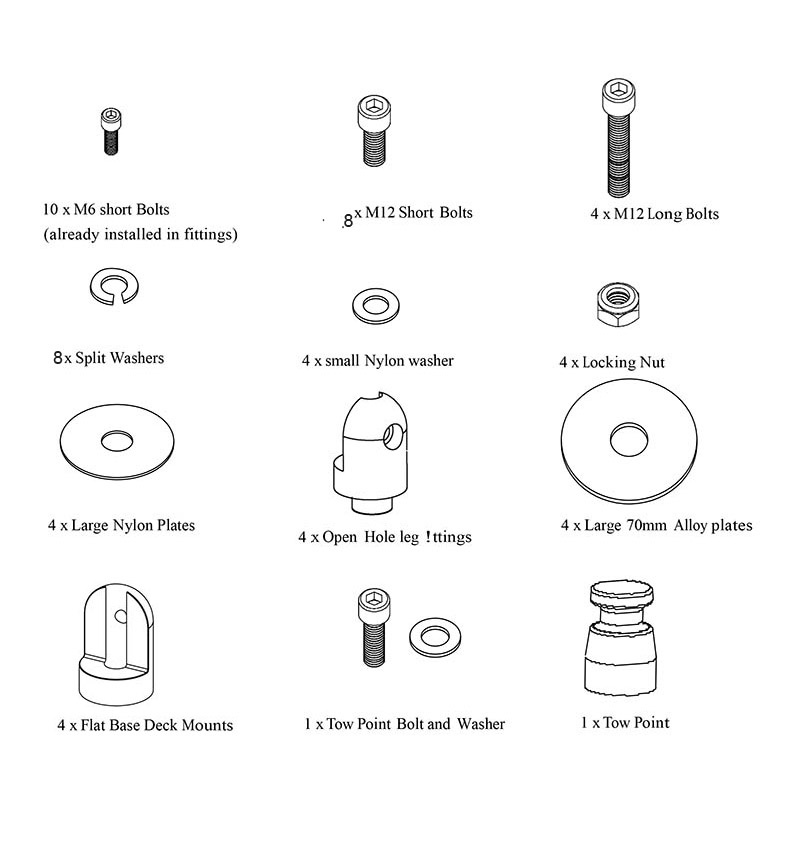
Detailed mounting kit for wakeboard boat.
The smaller carton will include the 2 bottom bars and pontoon boat mounting kit.
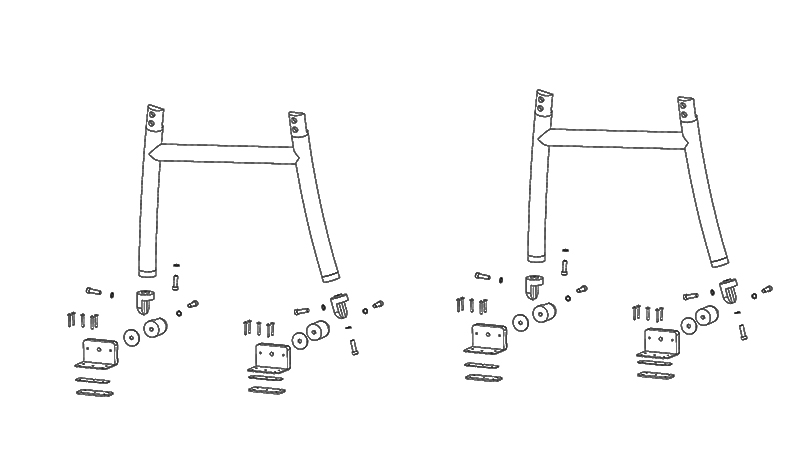
Detailed mounting kit for pontoon boat
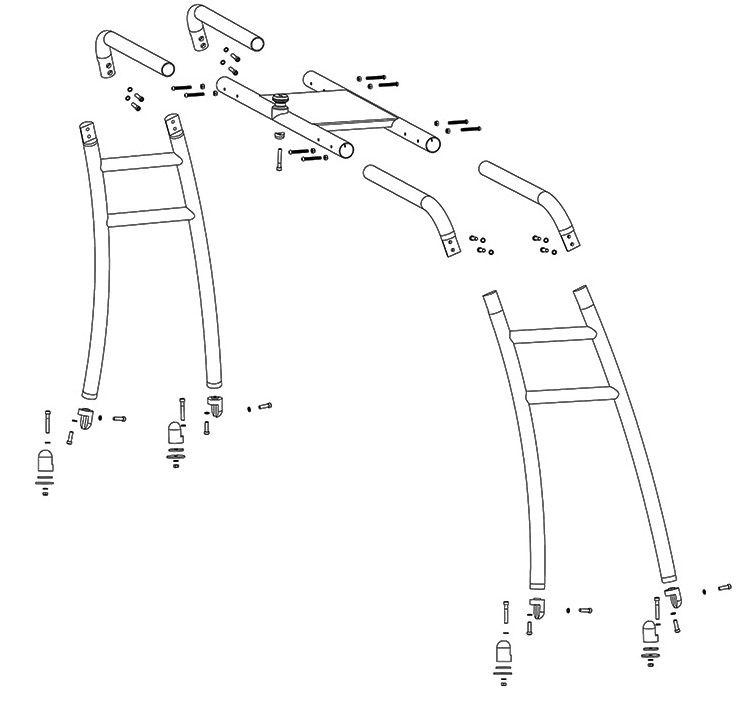
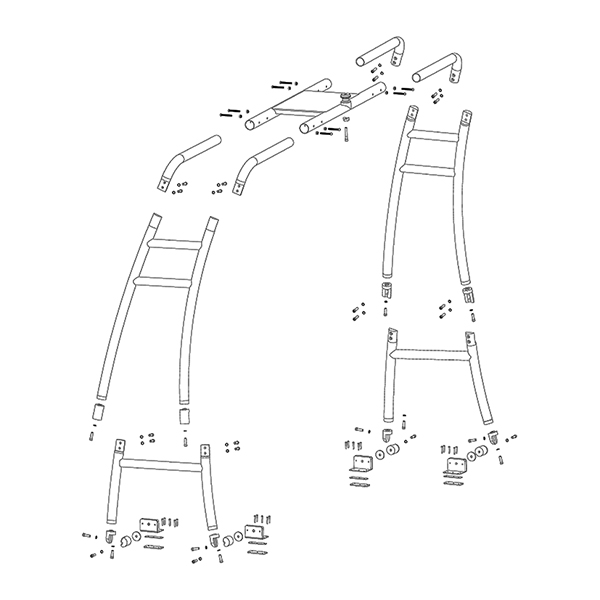
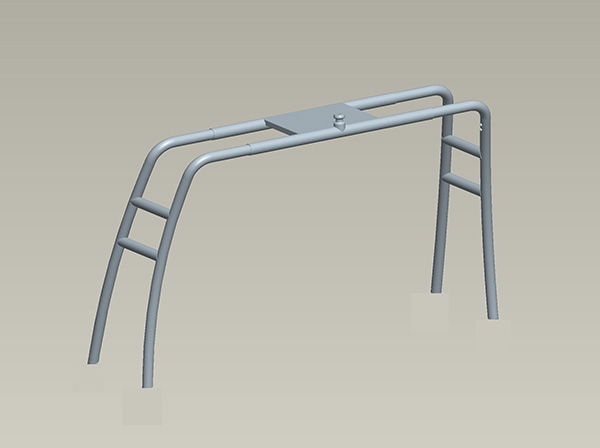
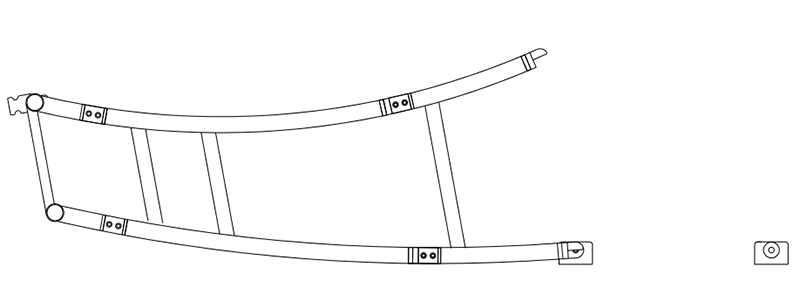
Step 1: First of all, have a look over the exploded drawing of the tower and learn the necessary dimensions you need to know before installation.
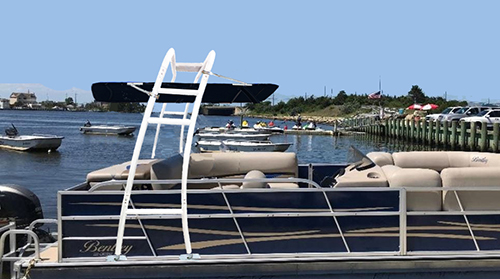
Step2: Think about where you will install the tower and how you would like it face forward or backwards. After you have a decision insert the L shape bracket under the guardrail of your pontoon boat.
Tips:
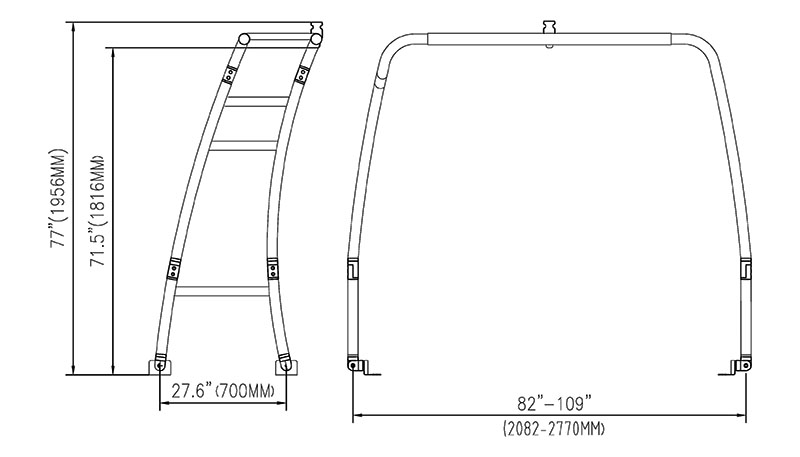
1. You need to check if you have a perfect 27.6"(700MM) distance to fit the front and rear feet of the base bar.
2. Please check if underside of the deck is clear, you may adjust the mounting position in case any bars block.
3. You can install the tower facing forward or backwards freely according to your needs. If you have a tower bimini, please consider if it will sit above the area you prefer.
Step3: Measure the width outside to outside, and check if your dimension is between 78in-105in. If less than 78in, you may cut the horizontal arms to get a narrower tower. If above 105in, you may have to contact us to order a longer H top section.
Step4: Put the parts in the big carton together and get a tower as below. Insert the horizontal arms into H top section and make the width as close as your measurement, but keep the tower loose. do not tighten the bolts.
Tips:
1. Firstly insert the 4x L arms into the H top section, keep them loose, and then attach the 2x H legs to the arms. You cannot reverse order or you will feel hard to insert the horizontal arms into H section.
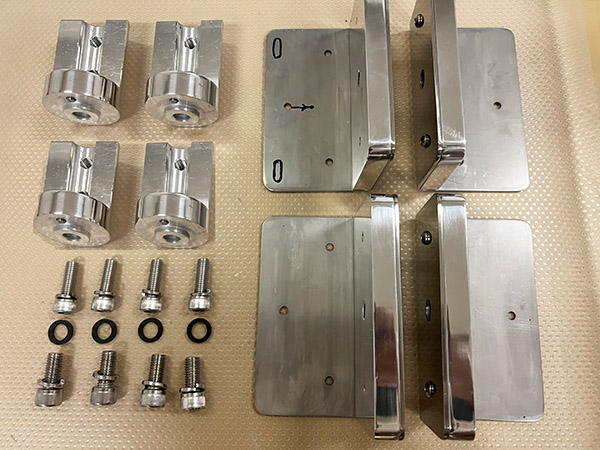
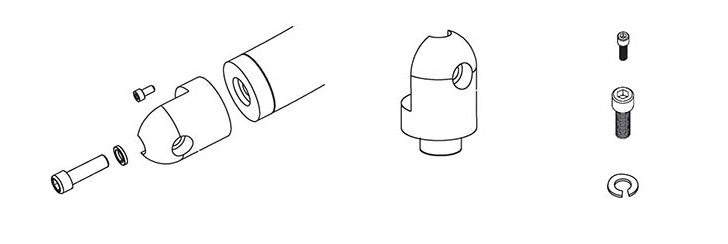
2. Do not attach the round feet on the leg, keep in mind the round feet is for a standard wakeboard tower, but now you will let the tower sit on the base bars, so take out 4x square feet from the base bar package, and attach the 4x square feet to the 4 legs. Put the 4x round feet aside, you will need them when assemble the base bars.
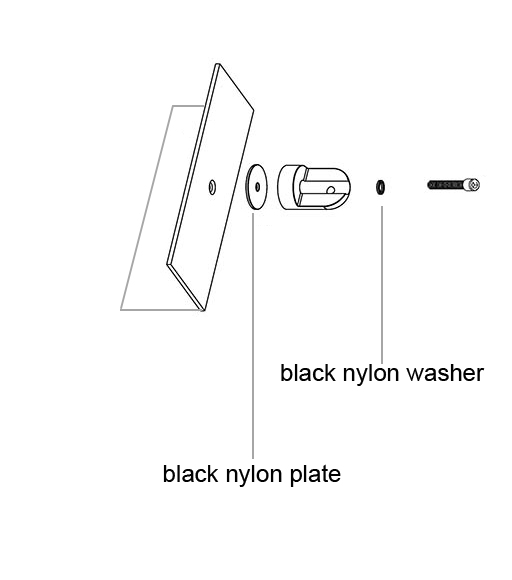
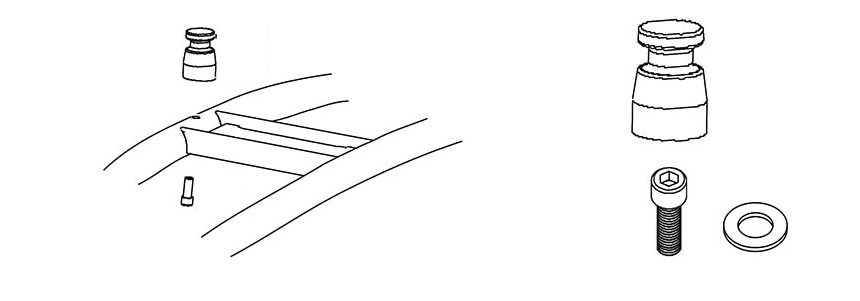
Step5: Attach the 4x L plates to the 2x base bars. We recommend this step before you attach the L parts to boat because this can make sure you have exact distance from front feet to rear.
Tip: Please make sure you put the black nylon plate and washer as below drawing, this is essential part to help you fold the tower smoothly.
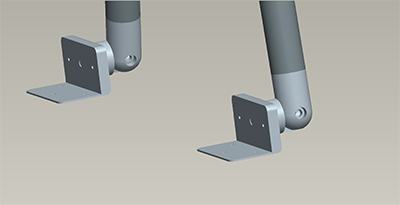
Step6: Attach the base bars to your boat. Insert L part under guardrail, you need to find a center reference, and measure to make sure the left and right base bars are symmetrical. This is very important step to ensure your tower is installed without problems.
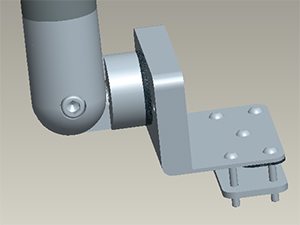
There are 5 holes on the plate, however 2 holes might be covered by the guardrail, in this case, you can use the other 3 holes which are also firm enough to hold the tower.
as the L part sit on the outside edge. there might be a gap between the L part and deck, in this case you can use the rubber or metal washer or both to fill the gap. Make sure it is a firm connection which is the most important factor to for the tower strength.
The backing plate must be put under the deck, you can cut the backing plate to fit in case there is any bar block it, however you must not ignore it which will lower the tower strength and casue a damage to your boat or serious personal injuries.
Step7: Attach the top tower to the base bar. Lift the top tower and put it on the base bars, adjust the width by sliding the horizontal arms and connect the square feet with bolts and washers. Do not tighten any bolt at this time.
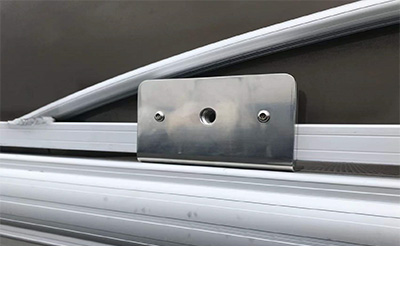
Step8: Aseemble the tow eye on the top section, check if it is just at the center of the tower. Go over the whole tower and make sure all feet are connected without problem. Now you can drill the holes through the top section bar and connect the horizontal arms with 8x long bolts and nuts.
Step9: Recheck the assembly and tighten all bolts. If you have a Reborn tower bimini, please refer the bimini installation guide on www.reborntower.com
How to fold the tower
Disassemble the front or rear feet from the L parts, you can push down the tower to the opposite direction.
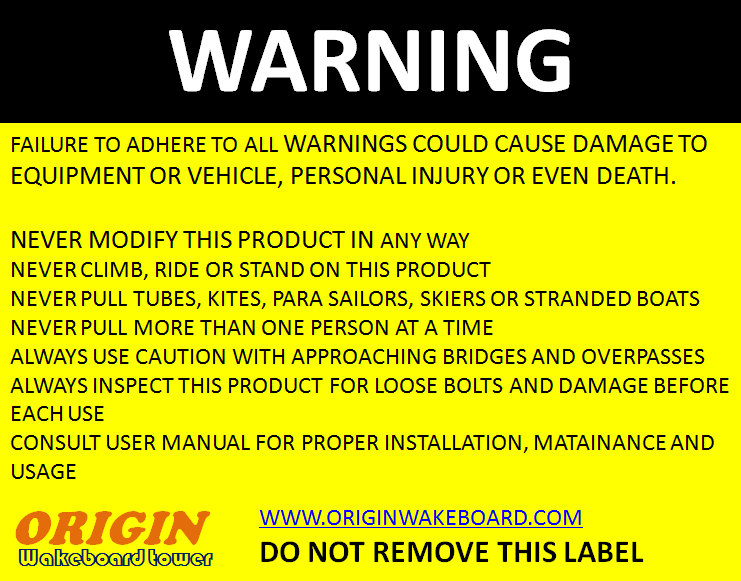
CARE AND MAINTENANCE
Be sure to check and tighten all fasteners and connections prior to every use
Be cautious when towing or driving under obstacles, low hanging structures or
trees Leave dolphin t top in the erect position when towing behind a vehicle
Use soap and water to clean your tower. Avoid abrasive material that might
scratch or damage the tower protective finish. Always rinse and wipe down tower
after contact with salt (brackish) water.